May 29, 2012

Fire Wasp Space Marine Terminator

Warhammer update time again.
 This time I have completed what will end up being the first of my Fire Wasp Terminator squad. I have decided not to stick with just one single chapter...after all what would be the fun in painting all my Space Marines the same. After all they all serve the same Emperor, and thus should work together towards a common cause. Now I know that some chapters despise other chapters and will only help them because they have too. But I don't really care about that when I am choosing what ones to paint, and how.

Now that I have painted a few of these I decided to show the steps I used to paint a Fire Wasp Terminator.

1. Prime it white. I didn't show that, but you can guess what it looked like. The same pretty much only white (:
2. I used Baby Poop, and Yellow snow 50/50 mix with about 3 drops of water to create the wash base for  the model.
3. Here I used the darkest yellow I had mix with a light grey. Yellow has terrible coverage ability. That being said if you add a drop of grey the coverage greatly improves. So That's what I did.
Below you can see a side to side comparison the left one is wash only, the right one is 1st layer of color.
Yes that is a collector Gundam Ramen cup in the background...what better cup to use?

Same comparison, just this time left is wash only, and right is 2nd layer of an even lighter yellow.
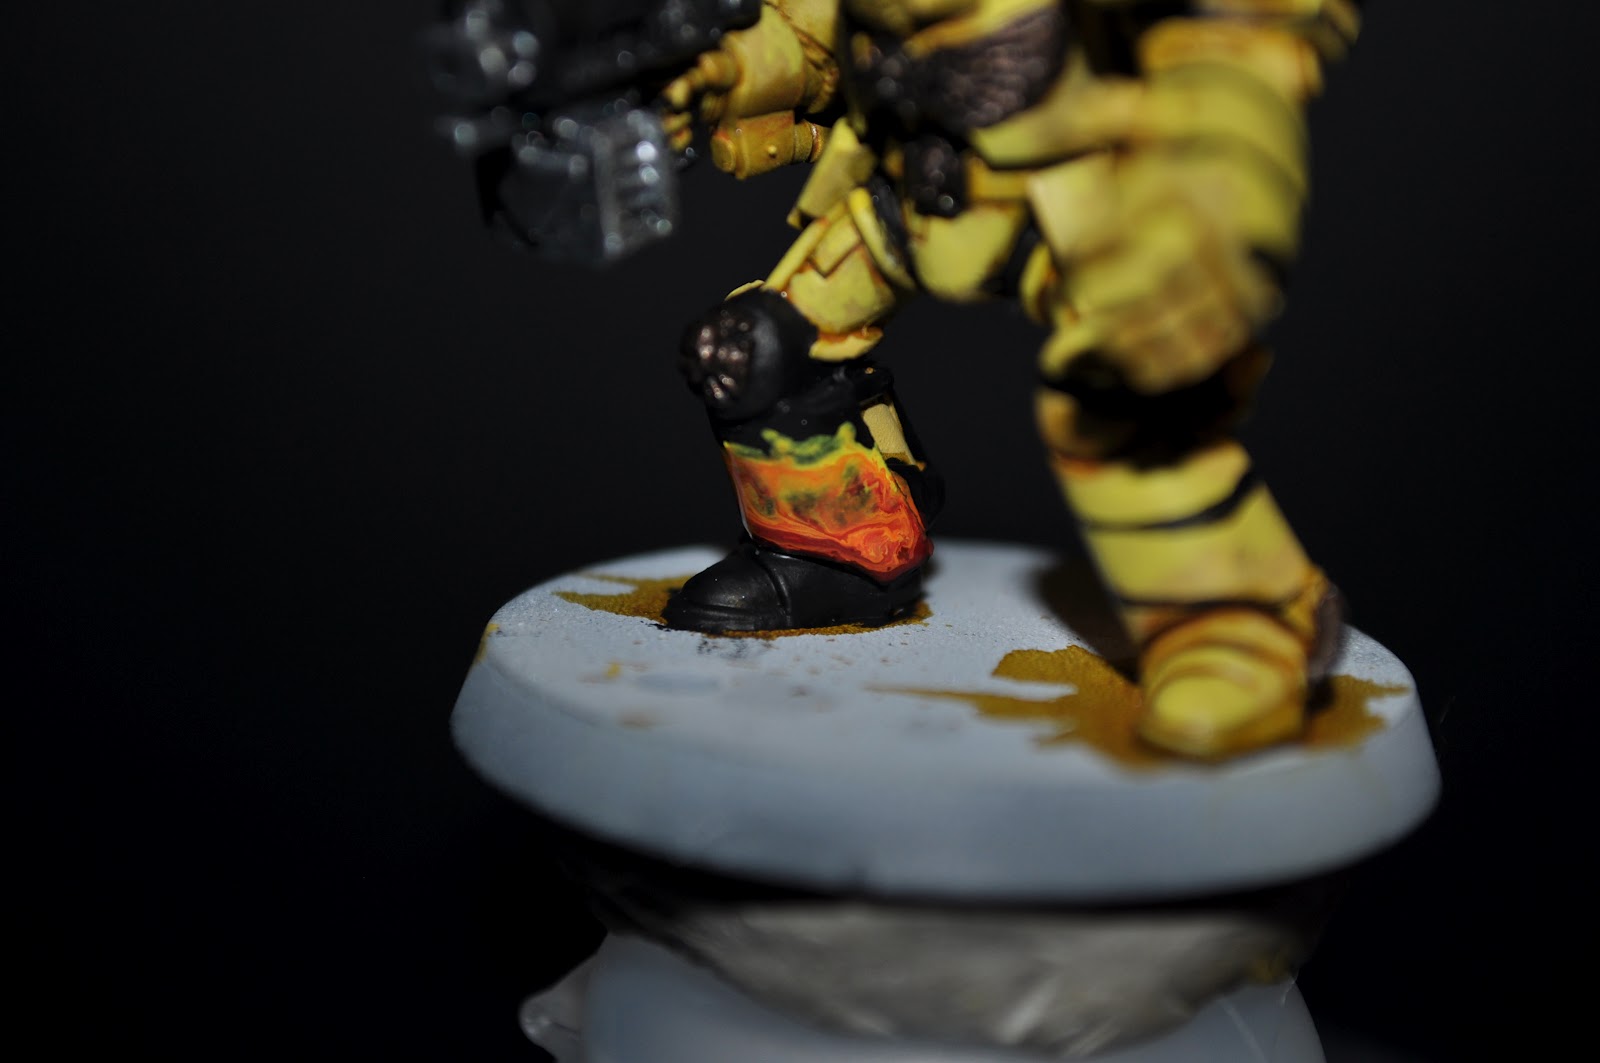
After that I forgot to take pictures of the parts I painted black. Sorry, Basically straight black, then on the metallic parts a 50/50 mix of black and tin to give it a very dark black metallic look. I used a glazing medium in the red, yellow, and orange for the flames. By using glazing compounds the paint becomes very viscous and wet blends very well with other paints. But it doesn't thin the paint out like water would.
I used a long hair brush to  make the stripes allowing me to just pull across. Not a bad job for my first time free handing stripes on a round surface. Oh and you can see the 2 layer dry brush on the bolter.
Hand painted arrow. Lesson learned there was to draw it with a pencil first. Not perfect, but all right.


Close up of the flames.

Base isn't finished I know. Needed to let the paint dry tonight then I will base him up. As I am learning the game of WH40k, I don't intend anything fancy that makes it so he isn't playable.

As always thanks for stopping by. C/C welcome,
T.G.

May 27, 2012

Space Marine Fire Wasps Razor

As I finish my first Fire Wasp Razor, I figure I should show you where I am getting the color scheme from.  This link will take you to the place that I have found for the Space marine Chapters. I am not saying its the end all be all list, but its a good list none the less its a pretty thorough one for me to use.

The one I want you to pay attention to are the Fire Wasps. The other ones are nice too, but not being painted by me right now.
And here you go! A Fire Wasp Razor. Stripes one the left I didn't want to paint the right black, so I did the flames in the center.
A little weathering where the exhaust would be.
The model was too large to do weathering on. I used my airbrush...I missed using it. To get a really nice even yellow color. The Vallejo colors yellow is very slow to cover requiring a lot of layers. That isn't a big deal on a Space Marine, but this thing is a little bigger, and thus multi-layer isn't really something that fits into my lack of patience personality.

I used the flame idea on the crest of the tail section. And added a rifle, and some extra fuel to break up the plain lines.
Here you can see the stripes. All hand painted by the way. I wanted to practice my hand painting for the lines, especially because the space marines are a lot smaller and going to take a lot of steady painting.


Well, I have been working on this for a few days now. Hope you like it. As always thanks for stopping by.  T.G.

May 26, 2012


Well as I like to do at milestones for my small blog I like to thank everyone for viewing my work, leaving comments, and hopefully enjoying my work. The only lesson that I have been reminded of in the past 2+ years is that the anonymity of the Internet will enable people to hide and make rude comments. So sorry for the comment moderation, but if you make a comment I want to read it and reply to it. Not just sit back and wonder if the things you are bashing me about are things you are able to do yourself. Enough rant...THANK YOU SO VERY MUCH for continuing to come back and see what I am doing. 

Don't worry to you Gundam fans out there. I am having withdrawals from Gundam myself, but I am moving in a few weeks and have to get all that large stuff packed up so I can continue to build from back in the U.S. I have over 30 in my back stock right now....so needless to say I will be building again as soon as I get everything back in the U.S. 

(: As always thank you for stopping by.

T.G.

Thank you to ~Higure San for the image.

May 25, 2012

Space Marines, a Necron, and a Dreadnaught.

I have a back log of finished Mini's. I will say that I think I have whittled down the chapter choices to two chapters, of course its not one of the color schemes I have used so far. The winners for now are The Falcons Sanguine and the Fire Wasps, with the Fire Wasps in a slight lead right now.  Choosing just one is just too hard to do. I honestly don't see it as a hard rule to chose only one Space Marine Chapter. And if it is a rule, then consider me a rebel. You can see my Black Wings Captain. and below a Black Wing Space Marine. The cape was a challenge for sure. Getting it to look like cloth was fun.
Also on the power sword I used a wet blending technique, it was fun, and not as easy as it looked on the video I watched. I am happy with how it came out though.


A closer view of the sword.
The Grunt Marine with a flamer.


Enough Space Marines, Here is my Necron Overlord. Staying with the orange color scheme, but improving IMO on the blending of the colors from the first one. I am really pleased with how this one came out. That lightening effect on the shoulders, the really dark metal look of the cape, and the clean metal look of the rest of the model. I used an orange wash on the metal to darken it some and add a final bit of detail to it.
I am sticking with the green color for the weapons, I think its a nice contrast in color from the orange.


Oh all right another Space Marine, My first dreadnaught. I added some pal-plate to the top of it to break up the flat areas a little bit. And worked on the details in the base. I really like the base on this one. I think it has some good details, but is still easily playable. And in the end that is the goal right.


A shot of the top I added the plates on the right side of the model and the circle pieces on the left side of the model.
Well, that's where I am at with this adventure so far. I have some tanks to paint, some awesome Necron stuff coming in the mail, and eventually I will get to the Orcs that I have. I doubt I will ever play them though. It takes too many of them.

As always thanks for stopping by.

May 21, 2012

WH Tank, and colors

Warhammer work continues! I got my tanks...I know its a Razor, but its basically a tank. I have to say this one is a little older 1999, and man it needed a lot of clean-up! As you can see from the photos; I have been working on getting the seam lines covered and its been a nightmare.


I did manage to finish the clean up, added some pal-plate to the upper sides to give a heavier armor look. I started to paint it, but I can't decided if the paint scheme I started using is one that I really want. So its on hold as I practice on a few lesser marines.

All that being said in my research I found a great link for the color schemes of Space Marines. I am still sifting through them to make decisions on the ones I like most, I may just end up painting a ton of singles for a little while so I can make a better decision. Already have the Ultra-Marine Chapter done. and a Necron Overlord...I owe pictures I know. Needed the base to dry. So here is the link Space Marine color charts. Hope it helps save some search time.

I will get some more stuff up soon with colors hopefully. As always thanks for stopping by T.G.